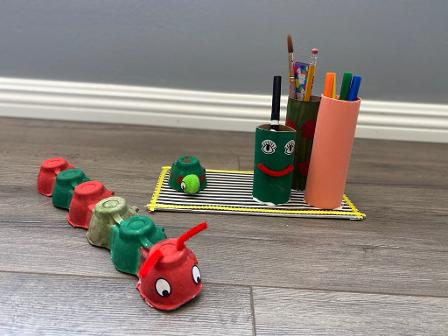
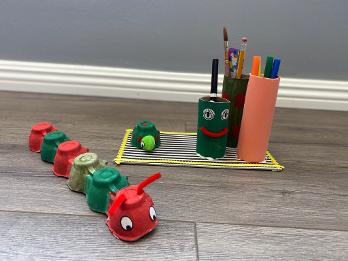
MCDC ART PAGE
 
Welcome to the Art Page!

WEEKLY CRAFTS

Primary Craft Template


STEPS:
1. Paint the toilet paper roll to any color you want. You can use paint or markers, crayons to color it.
2. Cut the circle from template and trace it onto black construction paper. If you do not have the paper, you can color the template black. 
3. Cut the circle for the wings and trace on red paper. 
4. To make the dots, you can trace the small circle or draw some black dots on the wings. 
5. Cut the lady bug head from the template and trace over black construction paper. You can also color the template.
6. Glue the body to the head. Glue the wings on top. 
7. Cut strips of paper and glue underneath the toilet paper roll. 
8. punch a hole in both sides of the toilet paper toll and string a ribbon or yarn. Tie of the ends. You can also tape the string, ribbon or yarn on both sides. 
9. Glue your ladybug on the toilet paper roll. 
There you have it! A cute ladybug windsock to hang outside. Please send us a picture of your ladybug. 


ART CLUB 

Let's have some fun drawing!

THIS WEEK'S DRAWING


Keep drawing and like in art class, we always say to "draw from life". Keep practicing by drawing things you see everyday, like a table lamp, a tree, your dog sitting, or your family member. It's so important to practice. This gives us a visual dictionary that allows to freely draw whatever we want to draw. When we know how to draw things, people, landscapes, then we can add our imagination and create fun and exciting details to it. Have fun drawing and draw everyday! 


Join Ms. Annie as she draws numbers and makes animals out of them. Fun draw for the little ones and big kids! Have Fun!


My favorite frog. Let's draw some cute Kawaii!


This week's drawing is for Mother's Day. This is Mama Bear and Baby Bear. Have fun drawing this for your mom. Make sure you greet them and give them a big hug this Mother's Day! 


Today's art is inspired by Mermay! Narwhals are medium sized, pale-colored whales found in the Arctic coastal waters. They called the unicorns of the sea. Why unicorn? As you can see, they have a horn right below their eyes. These horns you see are tusks. Narwhals have two teeth; and in males, it grows right through their upper lip.

Mermaids are mythological water creatures that are half fish and half human. They appear in folklore and popular culture. Stories about mermaids can be traced back in Assyria c. 1000 BC. You will discover many fascinating stories about mermaids. Mermaids have been popularized by author, Hans Christian Anderson, and Disney's, The Little Mermaid, Ariel. Today, let's draw a narwhal and mermaid. Have fun! 


GENTLE GIANT

Since this week's theme is reptiles, how about we draw one of the famous reptiles we know, the dinosaur? But this dinosaur, instead of being a terrible terror, let's make him a gentle giant. In this video, you will learn some building blocks of drawing a dinosaur. Remember how important shapes are in putting a drawing together. Don't see it as I have to draw a dinosaur, see it as different shapes connected to make a dinosaur. As always, we start our art class with our warm up. Spend 2-5 minutes with our warm up circles and 8's. Have fun and always remember to practice. The first try might not be great, but keep at it. Like in art class, we try to draw 3-5 times and when you look at your drawing it looks so much better than the first. When you draw 10 or more times, it's better than the first one! Awesome, blossom! Draw, draw, draw! Have fun!!!


ARTS AND CRAFT WITH MS MARY (FRIDAYS AT 1:00 P.M.)
FLOWER MOSAIC ART PROJECT FOR APRIL 24.pdf FLOWER MOSAIC ART PROJECT FOR APRIL 24.pdf
Size : 395.236 Kb
Type : pdf


IF YOU DO NOT HAVE BEANS AND PASTA, HERE'S ANOTHER WAY TO MAKE IT USING GIFT WRAP TISSUE PAPER. (These are recycled ones. You can have other colors if you want.)


ARTS AND CRAFTS WITH MS CRESCA (PRIMARY APRIL 22)
REPTILE CRAFT APRIL 22.pdf REPTILE CRAFT APRIL 22.pdf
Size : 650.17 Kb
Type : pdf


ART CLUB DRAWING FORWEEK 4 APRIL 17

This week's drawing is a bird! Have fun drawing and don't forget to email us your drawings!

Flying

Seems silly that birds fly airplanes when they can fly. But that's the great thing about drawing. You can create whatever you want! Since this week's theme is about birds, let draw an adventurous aviator!


CRAFT TIME WITH MS MARY WEEK 3 APRIL 17

Recycle, Reuse, and Reduce. We will be making some fun craft items you can find at home. 


MARKER HOLDER

Materials: 
Box or cardboard 3 x 6 inches (decorate, paint, or cover with tissue paper, construction paper, or wrapping paper)
Toilet paper rolls (3 rolls)

Steps:
Cut the cardboard in a square. Cover or decorate. Add ribbons or cut long strips to glue around the perimeter of the cardboard. We will use this as the base of our marker holder.
Decorate or paint toilet paper rolls. (With tissue, lay paper down on hard surface, place toilet paper roll in corner and roll to wrap around the toilet paper roll. Glue the corners.)
Glue the bottom opening of the toilet paper rolls and place standing up on the cardboard rectangle. Hold it for a minute. 
Glue the remaining toilet paper rolls. 
Leave it out to dry for several hours. 
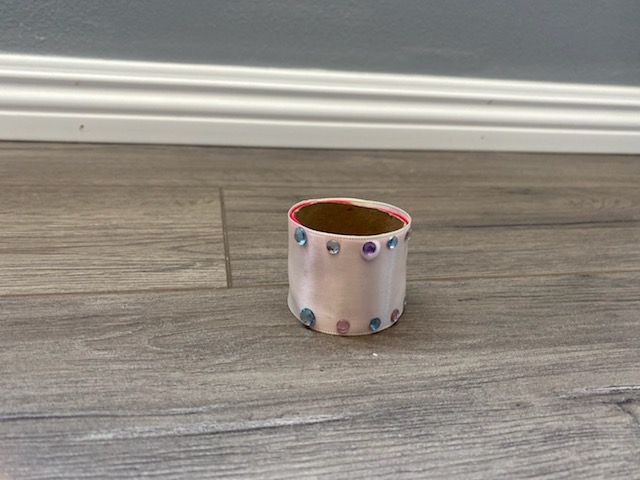


PLACEMAT RING

Materials:
Toilet paper roll
ribbon
paint
other decorations (if you don’t have items you can draw and color patterns)

Cut the toilet paper roll or paper towel roll about 2 inches. Glue ribbons or other decorations. You can also draw a pattern. 


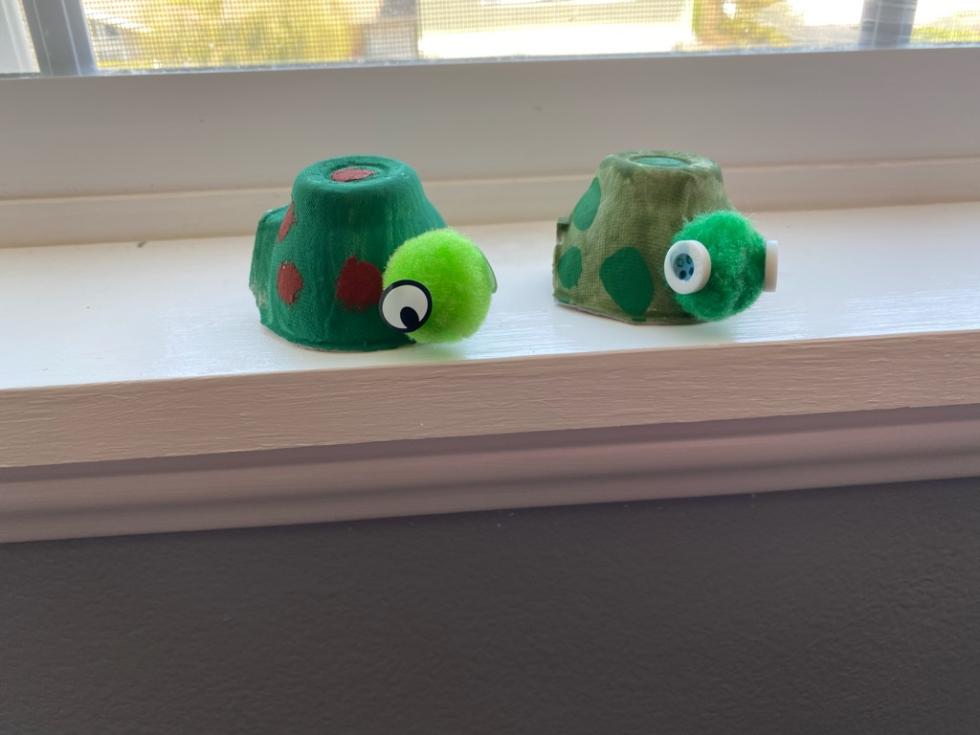
ANIMALS FROM EGG CARTONS

Egg Carton Turtle

Cut each segment of an egg carton
Paint it green
Glue google eyes (buttons or cut out some circle paper and draw eyes.)
Design to make the shell and legs of your turtle. 

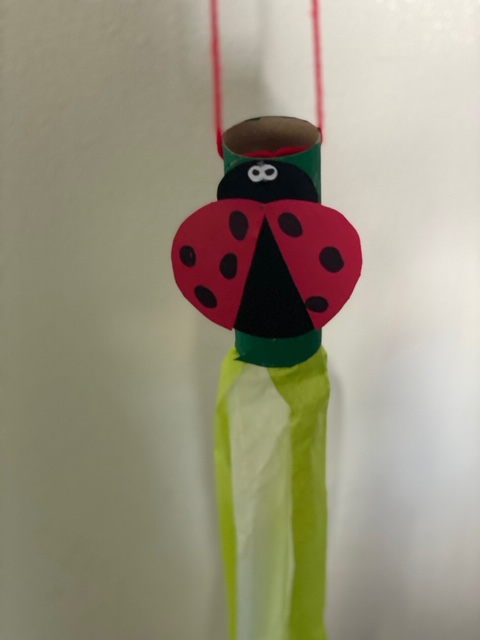
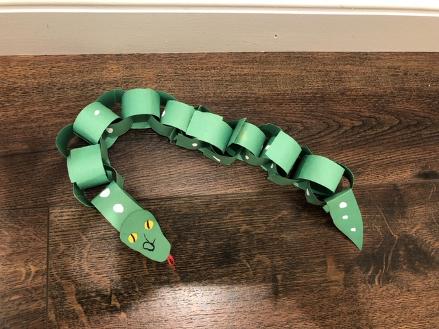
You can make other animals, such as a caterpillar, ladybugs, dogs, cats, porcupines, lions, tigers, and bears! 


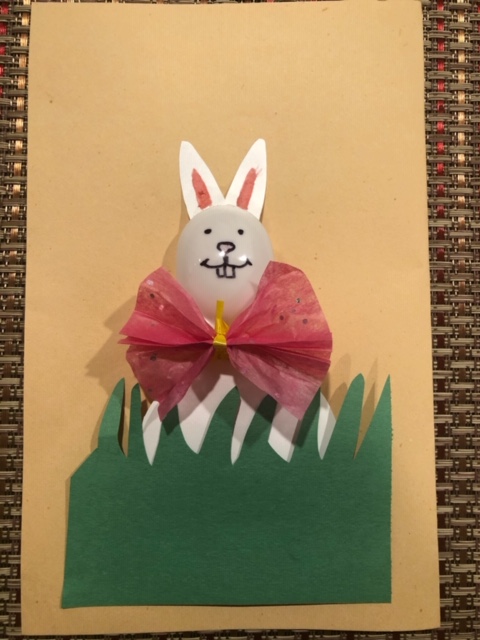
With this Earth Day project, we want you to be as creative as you can be. Look around the house for items you can reuse and create something beautiful. Look at old children’s magazines, cereal boxes, gift wrap, paper bags, and see what you can create. Share with us your art next week. Have fun!


FELT STORIES

dinosaur family.pdf dinosaur family.pdf
Size : 29.73 Kb
Type : pdf
hey diddle diddle.pdf hey diddle diddle.pdf
Size : 179.17 Kb
Type : pdf


CRAFTS

Read The Very Hungry Caterpillar.pdf Read The Very Hungry Caterpillar.pdf
Size : 214.122 Kb
Type : pdf


CRAFT TIME WITH MS. ANNIE AND MS. ERIKA
Wednesdays at 10:00 a.m. Check your email for the class link.


SPRING TIME BUNNY

Materials: 

  • Spoon
  • any paper with design or color. You can use tissue paper, magazine papers, craft paper, or color your own paper. 
  • glue or tape
  • construction paper or cardboard from cereal or snack box.
  • Permanent markers 

Steps: 

  1. Cut out pieces for ears, a circle for the tummy, and grass. 
  2. Cut a small rectangle for the bow. Pinch the center to make the bow tie. Tape or use a twist tie or a string. 
  3. Glue or tape your spoon bunny on the paper.
  4. Glue or tape the ears on the spoon.
  5. Glue or tape the body and the bow. 
  6. Glue or tape the grass. 
  7. Draw your bunny's face. 
  8. You can also use your bunny spoons as plant decorations or decorate your garden outside. Outdoor bunnies should have waterproof materials. Use grocery bags or food wrappers.


CRAFT TIME WITH MS. JEN
Wednesdays at 10:30 a.m. Check your email for the class link. 

THIS WEEK'S CRAFTS


EGG COLORING PROJECT – VOLANO EGG COLORING

Materials:

  • Hard-boiled eggs
  • food color
  • 2-3 tbs. baking soda
  • vinegar
  • 5 tbs. water
  • glass containers or bowls
EGG COLORING PROJECT.pdf EGG COLORING PROJECT.pdf
Size : 428.285 Kb
Type : pdf


CRAFT TIME WITH MS. MARY
Craft Time Days: Fridays at 1:00 p.m. Check you emails for the class link. 


SPRING BUNNY WREATH

SPRING WREATH BUNNY OUTLINE.pdf SPRING WREATH BUNNY OUTLINE.pdf
Size : 180.562 Kb
Type : pdf
EGGS TEMPLATE.pdf EGGS TEMPLATE.pdf
Size : 290.578 Kb
Type : pdf


Materials:

  • paper plate
  • glue stick
  • scissors
  • string
  • any art supplies to color your bunny and eggs

Note: if you do not have a printer, you can place the paper on your screen and trace the template. You can also draw it free hand. Remember bunnies and eggs are made up of shapes. Use circle for the face; oval for the ears, and draw the rest of the face. 

Steps: 

  1. Cut the inner circle of the paper plate. 
  2. Punch two holes on the top of the paper plate to put your strings. 
  3. Color the template with markers, crayons, colored pencils, and any art supplies you have available.
  4. Cut out the shapes. You will need 12 eggs to make the wreath.
  5. Leaving the two holes on the top of the wreath, glue your first egg. Create a pattern by alternating the different colored eggs. Only put glue on the egg not on the plate.
  6. Cut your bunny template or your bunny drawing. 
  7. Draw your bunny's face
  8. Glue your bunny onto the plate
  9. Put the string though the holes and hang your bunny wreath!
  10. Share your bunny art and email us your pictures! Have Fun! 


3D EGGS

Materials: 

  1. Construction paper egg cutouts - 5 cut outs. If you do not 
  2. Scissors
  3. any art materials for coloring
  4. string

Steps:

  1. Fold eggs vertically in half.
  2. Put glue on half of the egg and attach it to the other half of the egg.
  3. Fold and glue to the other eggs, until you have formed a fan structure 3D egg. 
  4. Punch a hole on the top of the egg.
  5. Tie the string and hang to decorate your home!
  6. Have fun!


Copyright Montessori Child Development Center